Discus fish, belonging to the genus Symphysodon, are renowned for their vibrant colors and distinctive disc-shaped bodies. There are three primary species of discus fish: the Heckel Discus or Red Discus (Symphysodon discus), the Green Discus or Tefe Discus (Symphysodon tarzoo), and the Blue Discus which accounts for the vast majority of commonly sold Discus, including Pigeon Blood Discus strain (Symphysodon aequifasciatus). These species are native to the Amazon River Basin in South America, where they inhabit slow-moving waters. The Heckel Discus is easily recognizable by its prominent vertical stripe running through the center of its body, while the Green Tefe are uncommon in anything other than the Wild Caught specimens. Aequifasciatus Discus are known for their striking color variations and patterns. These fish have been selectively bred in captivity to produce a wide array of color morphs, making them highly sought after by aquarium enthusiasts.

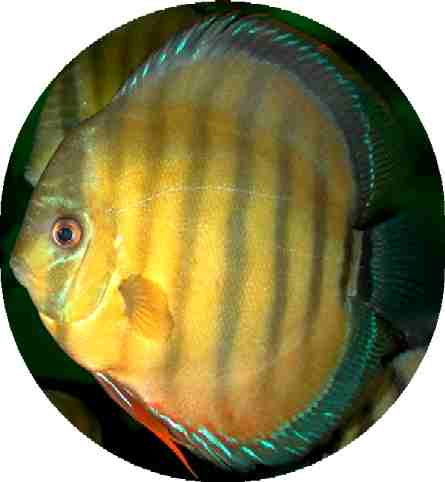
Wild Caught Tefe Discus
All of the fish listed on our website as of the writing of this Article are Aequifasciatus derived. We do not have any wild caught Discus in our inventory at this time, though we do occasionally sell them.
The Heckel Discus, named after the German ichthyologist Johann Jakob Heckel who did much of the early research on Discus, is the most distinctive of the three species. It features a bold, dark vertical stripe that bisects its body, along with several other fainter stripes. Not all strains of Heckel Discus have the fainter stripes. If you see a bold dark vertical stripe, it is a Heckel. If it does not have a bold dark vertical middle stripe, it is not a Heckle. This the wild caught specimens of Heckel Discus tend to be more sensitive to water conditions, requiring pristine water quality and stable temperatures to thrive. The captive bred Heckel Discus tend to be more hardy but less resistant to disease.
The Green Tefe Discus displays a range of green and brown hues, sometimes with intricate patterns of spots and stripes. This species is slightly more adaptable than the Heckel Discus but still demands careful attention to water parameters. Good luck finding them as they are sometimes hard to get.
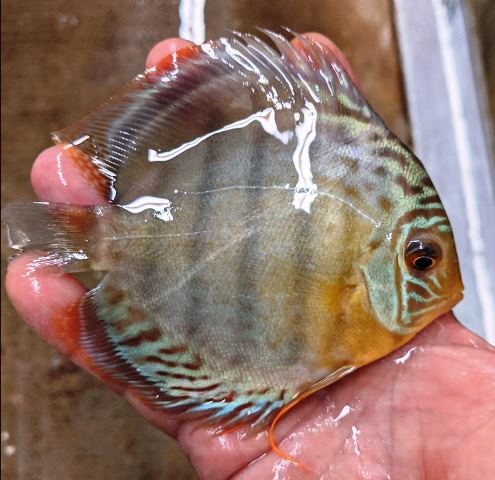
The Aequifasciatus Discus is the most common and most popular among hobbyists. The vast majority of captive bred Discus are Aequifasciatus derived. They showcase a dazzling array of blue shades, from deep cobalt to light turquoise. Its vibrant coloration and relatively hardy nature make it a favorite for aquarists. Most red and gold Discus are from the original captive bred strain called Pigeon Blood which was originally found and bred by Jack Wattley.
In addition to the natural species, numerous hybrid varieties have been developed through selective breeding. These hybrids exhibit an astonishing diversity of colors and patterns, such as the Red Turquoise, Blue Diamond, and Red Melon. Despite their beauty, Discus fish require a high level of care, including stable water conditions, a balanced diet, and a peaceful tank environment to flourish. They are not for the novice and should be kept by advanced aquarist. If you are just getting into the hobby, we would suggest you start with Angelfish and once you are successful with them and then move up to Discus. Angelfish mostly require the same water conditions as Discus but are hardier and less expensive.